
Looking for a new way to relax? This paper cranes tutorial using a traditional Japanese origami method might be just the thing.
Welcome to The Curiosity Academy, Stylist’s new learning hub where you can access workshops, how-to guides, new research and learn the most up-to-date skills from the UK’s most in-the-know people.
Making paper cranes is a Japanese tradition that symbolises hope, peace and healing. Legend goes that if you fold 1,000 origami cranes you will be granted one wish. People have been making paper birds for this reason for hundreds of years, but origami wasn’t popularised on a global level until the 20th century when paper became a product that was more readily available.
“It’s a mindful practice. It’s a tool people can use to give themselves a pause,” says Michael James Wong, the author of Senbazuru: Small Steps to Hope, Healing and Happiness.
Michael encourages making paper cranes as a mindfulness tool and as an alternative to other mindfulness methods like meditation. “Sometimes the best thing we can do when we need to slow down is to have something else to do that’s a bit slower,” he says, explaining origami is a way of calming your brain without getting frustrated by having to sit still and try to think about nothing for an extended period of time.
You may also like
Mindfulness alternatives: 8 steps to finding your inner silence
The paper crane became a universal symbol of hope after the Hiroshima disaster, Michael says. There is a story about a young girl who developed leukemia as a result of the bombing and decided to try and fold 1000 paper cranes as a method of healing. “If you go to Hiroshima memorial sites, there are paper cranes everywhere,” Michael says. “It’s something that has transcended cultures and communities.”
What you’ll need to make paper cranes
Traditionally, origami paper is used to make paper cranes, which is thinner and more delicate than typical paper. But Michael says that you can use any paper to fold, like scrap paper or old newspaper. “The only real recommendation is that it should be square,” he says. This is so your paper crane does not turn out wonky.
You can buy origami paper in almost any craft shop. In his tutorial Michael uses paper that is coloured on one side and plain on the other.
Making paper cranes is beginner-friendly and Michael is keen to stress you shouldn’t rush the process. You should enjoy each fold to get the best mindful benefits from it.
How to make paper cranes
-
1. The diagonal fold
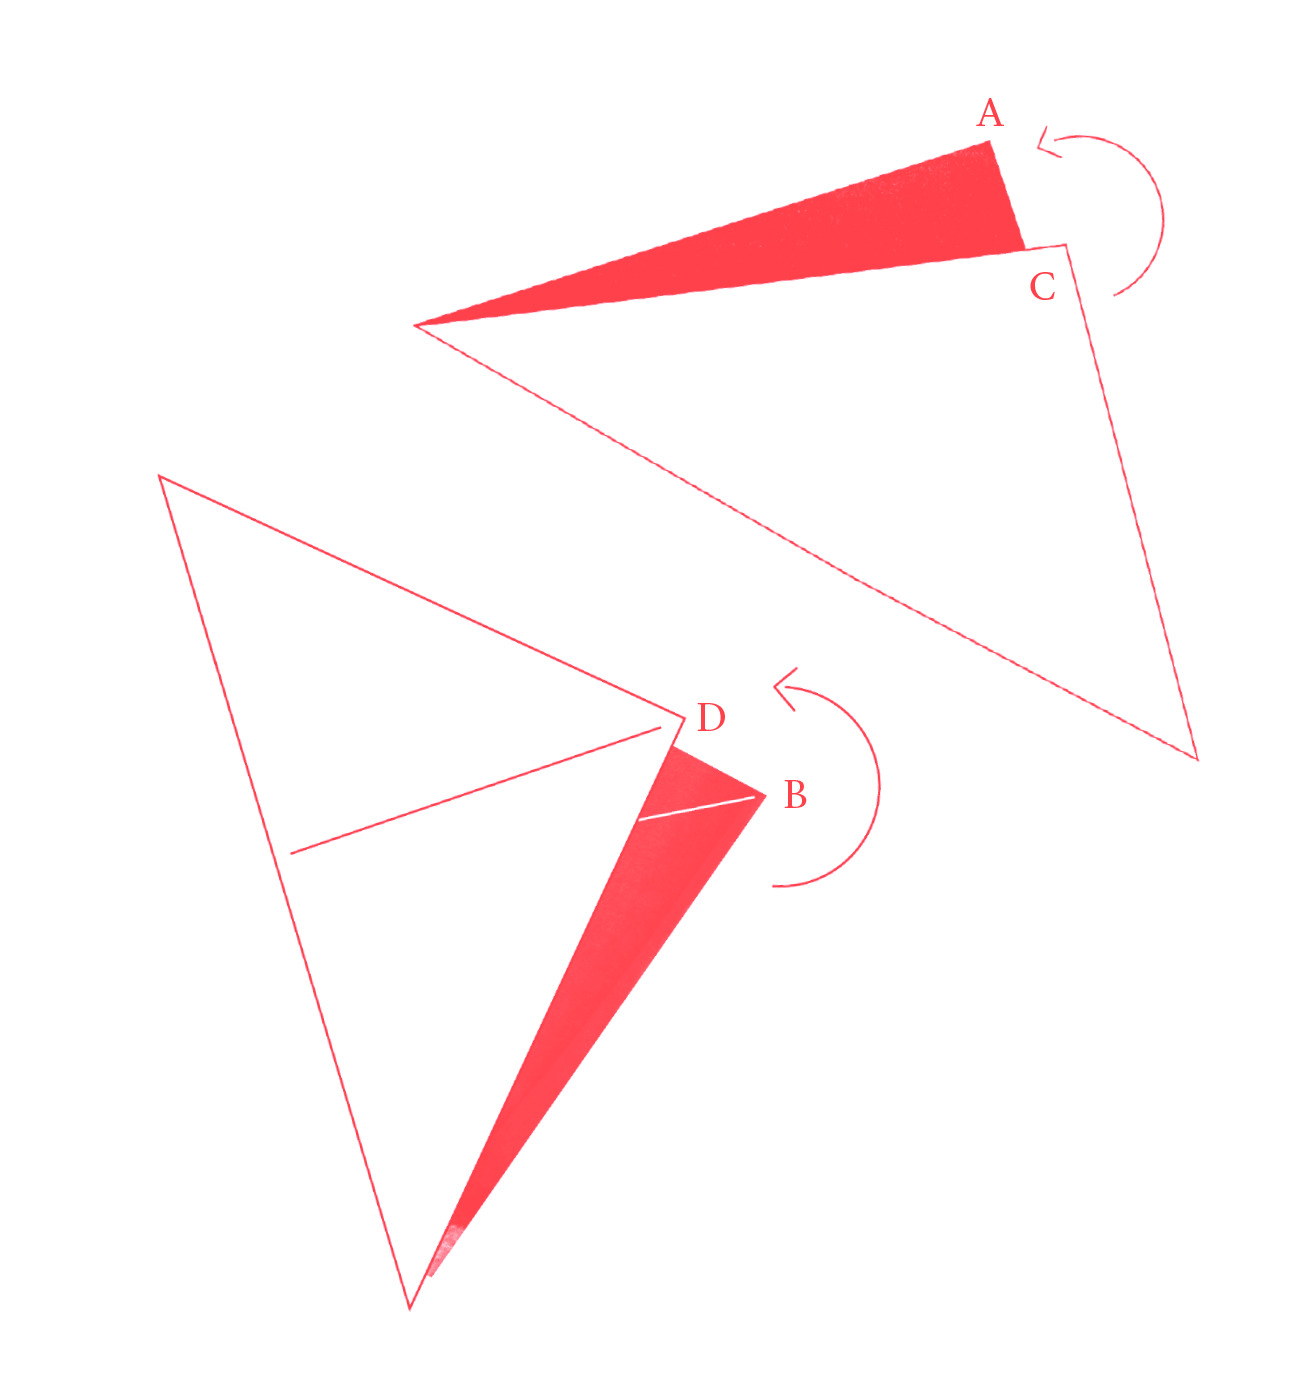
How to make paper cranes: the diagonal fold Start by folding the paper in half diagonally with the coloured side of the paper facing upwards.
Fold corners A to C, undo the fold and then fold again from B to D. Steady the paper as you begin so that it does not go awry.
Run your fingers along the edge of both folds, front and back, giving each one enough pressure to ensure the edges are sharp.
Then unfold the paper and lay it flat on the table.
-
2. The book fold
How to make paper cranes: the book fold. Turn the paper over so the coloured side is now facing down.
Fold the right-hand side of the paper over to the left horizontally like a book.
Repeat the fold again, folding the bottom side of the paper up to the top. This should give you a + over the x you created in step one.
Reopen the paper and return the sheet to the original square shape as it was when you began. The coloured side of the paper should be face down.
-
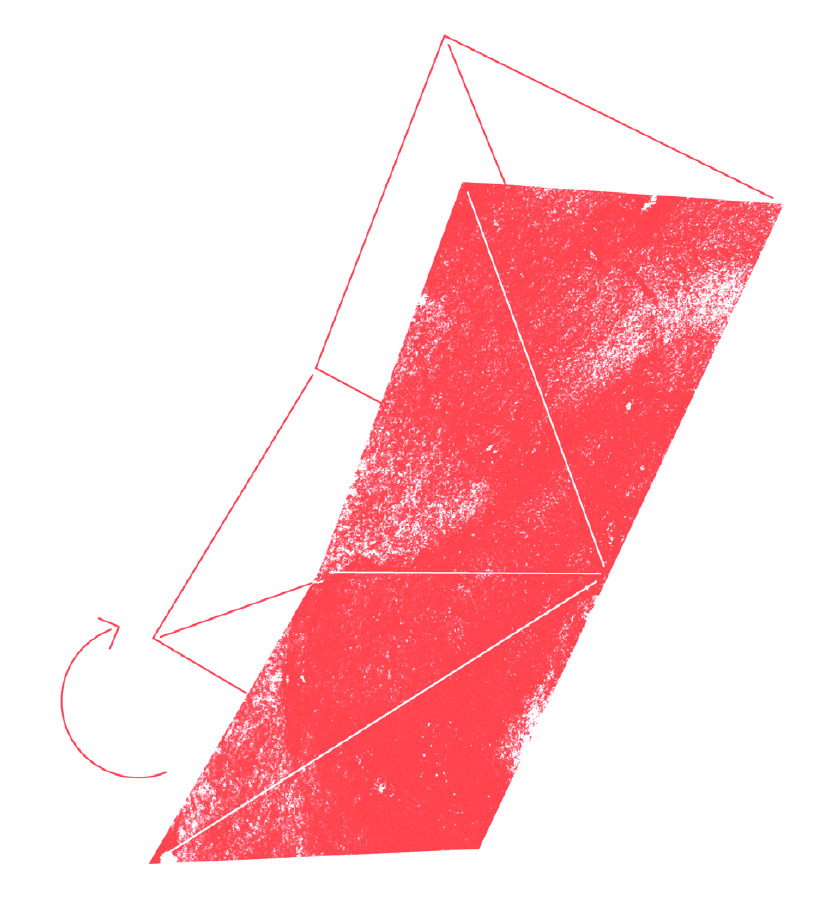
3. The sandwich fold
How to make paper cranes Position the paper like a diamond rather than a square, as you will find it easier in this position to manoeuvre the next fold.
First, gently take the outer two corners of the paper, one in each hand between the thumb and first finger, and pull them inwards towards the bottom corner. This will create a square at the base, with a triangle shape sticking up.
To finish the fold, press down the tip of the triangle that is sticking up so it joins the other corners. Press down to create a flat square.
-
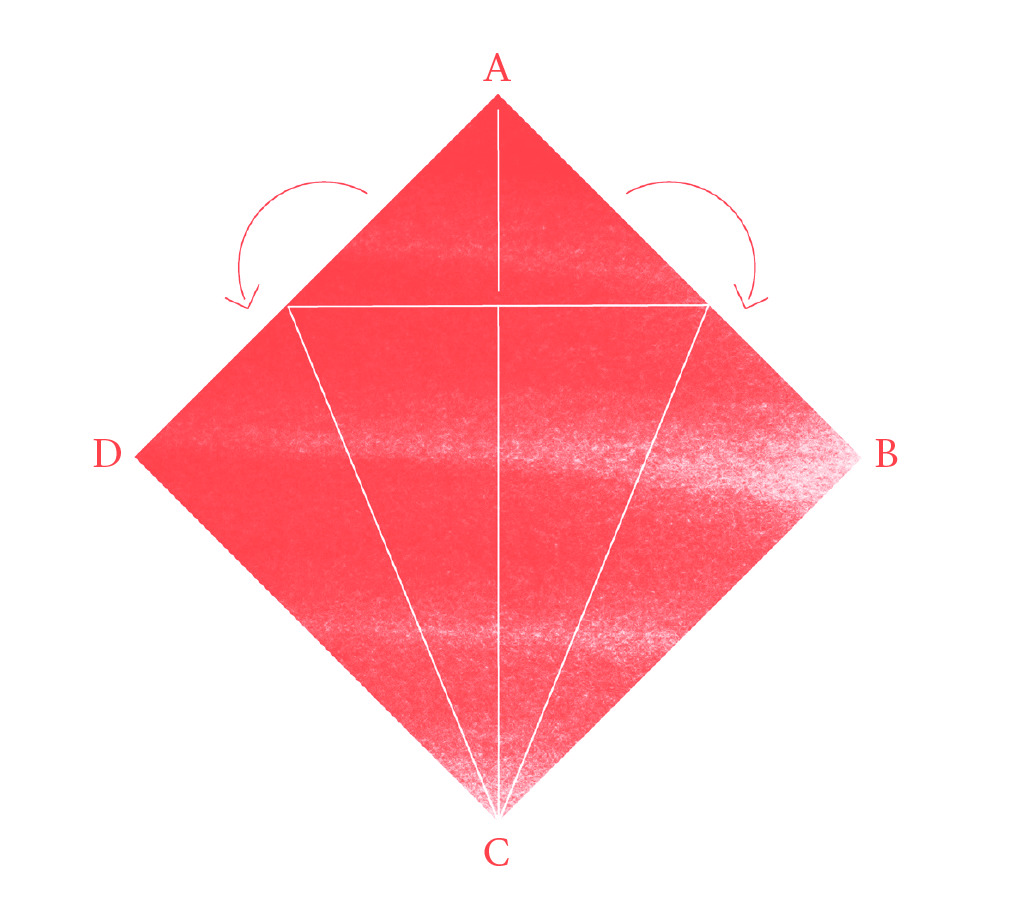
4. The kite fold
How to make paper cranes Position your newly created square like a diamond on the table with the open side facing towards you.
Take the right-hand corner (B) and fold the top flap up and in towards the centre line (aka the junction where all the lines cross between points A and C). The corner should touch the centre line and the edge you’ve folded in should run down along it.
Repeat this same fold with the left-hand corner (D). Only bring the top flap up and in towards the centre as before.
-
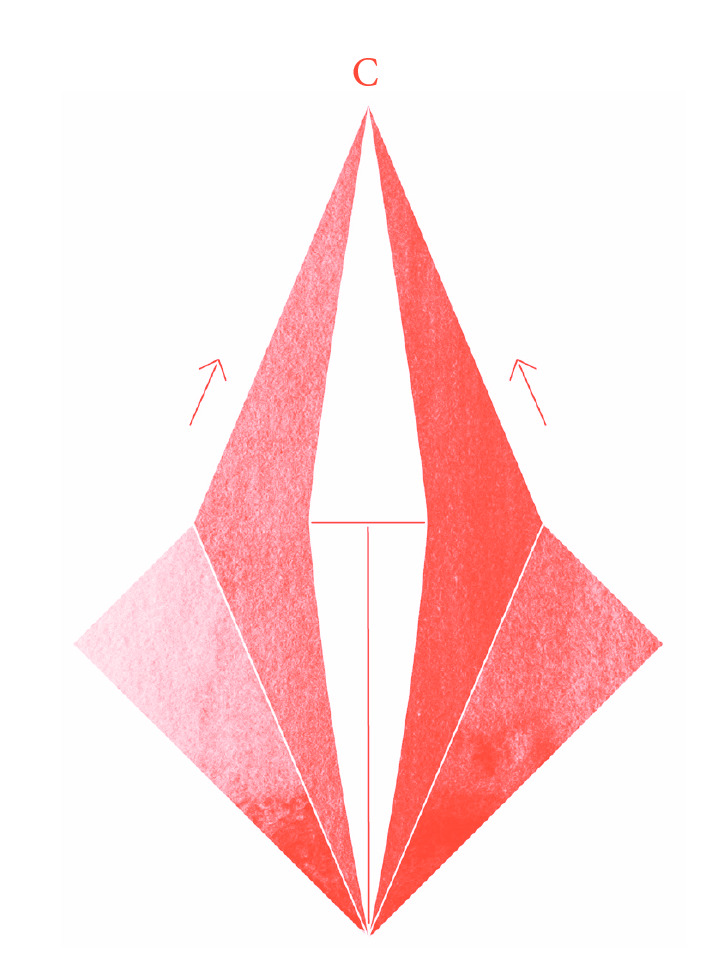
5. The triangle fold
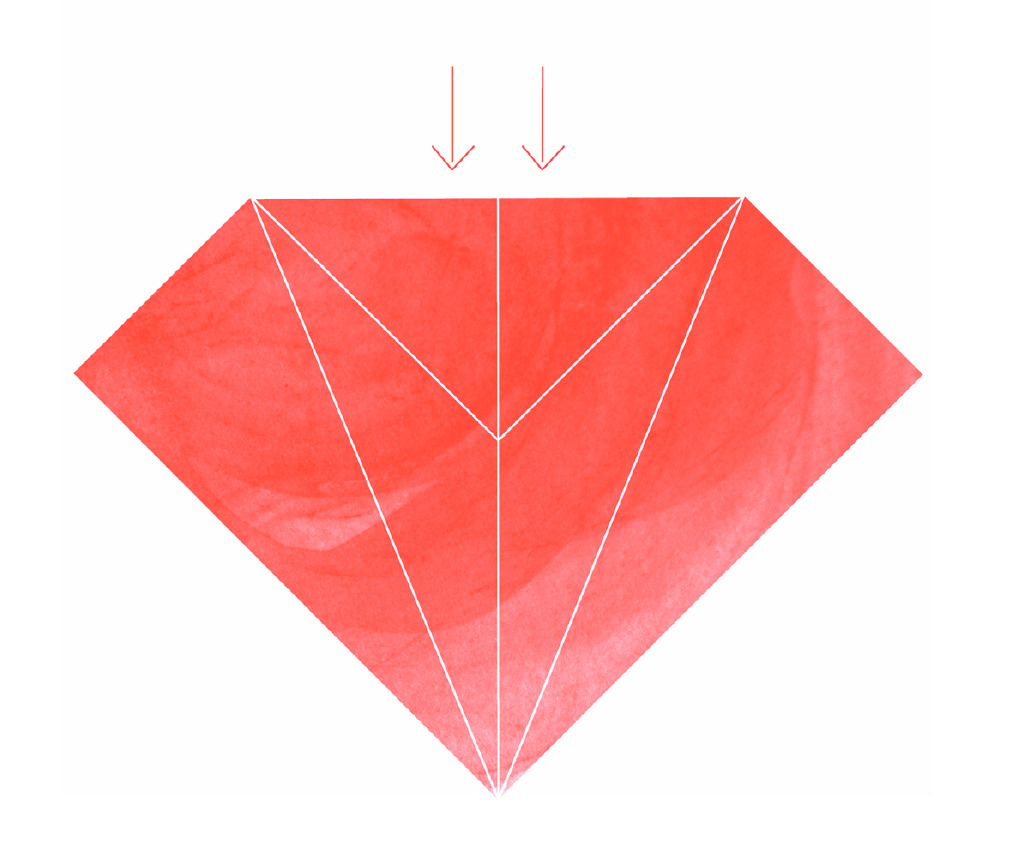
How to make paper cranes: the triangle fold. Once you have completed the flap-folds, carefully turn down the entire top triangle over your shape.
Take a moment to run your fingers along the crease, deepening and firming the fold.
Now unfold all the folds you’ve just made.
-
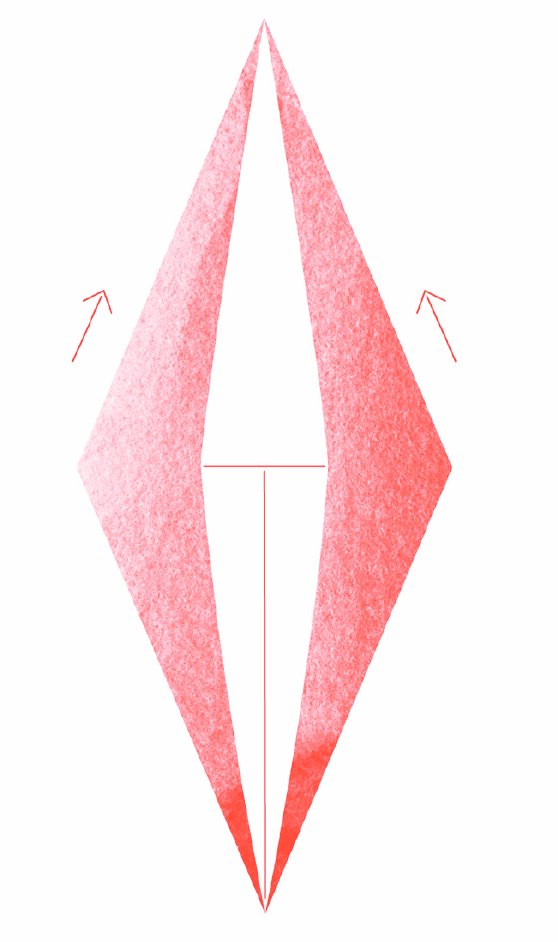
6. The seashell fold
How to make paper cranes: the seashell fold Then lift up the bottom corner of the top layer, while you hold down the other three corners on the lower layers, to reveal the belly of the fold. It should look like a frog’s mouth. At the centre of the belly will be a strong crease that you made earlier.
Pull the top corner up and back so it is flat (C). This should turn the outer side corners inwards to create a diamond shape on top of the folded square.
-
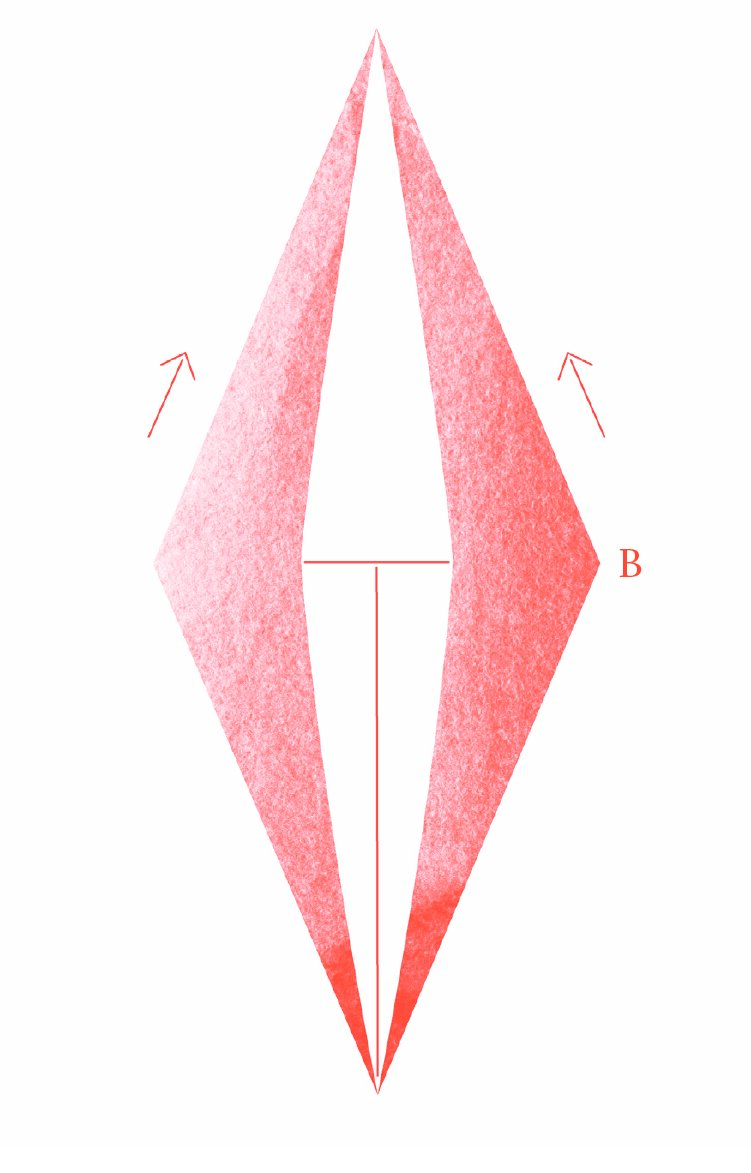
7. The diamond fold
How to make paper cranes: the diamond fold Flip the paper over and prepare to fold the second side to make a diamond.
Repeat the same process as before.
Take the right-hand corner of the square and fold it up and in towards the centre line. The corner should touch the centre line and the edge you’ve folded in should run down along it.
Repeat this same fold with the left-hand corner.
Then carefully turn down the entire top triangle of your shape.
Unfold all the folds you’ve just made.
Then lift the bottom corner of the top layer, holding down the other three corners on the lower layers, to reveal the belly of the fold.
Pull the top corner up and back so it is flat. This should turn the outer side corners inwards to create a diamond shape. It should mirror the diamond shape underneath.
-
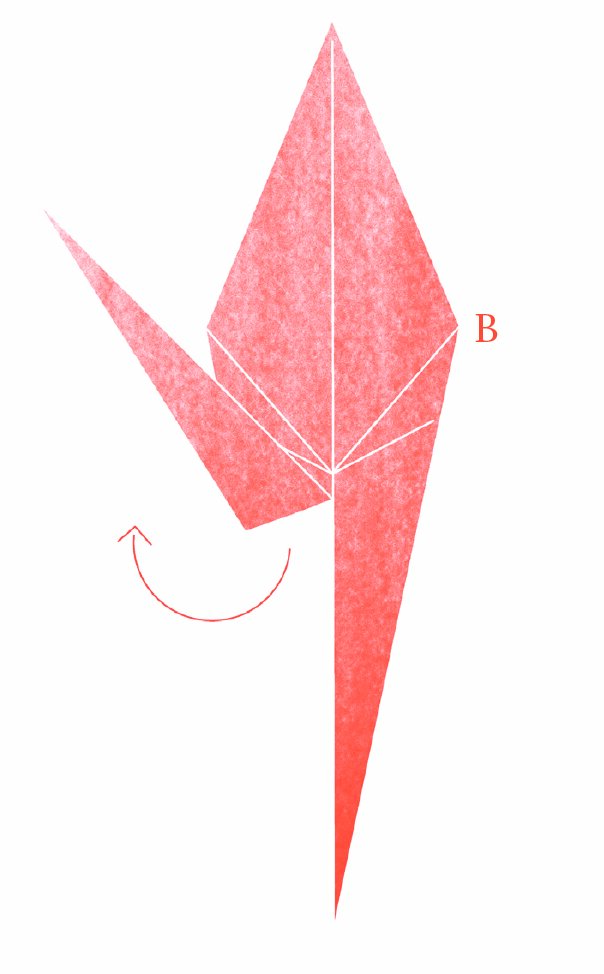
8. The feather of hope
How to make paper cranes: the feather of hope Start by taking the top layer of the right-side corner of the paper (B) and fold it up and in towards the middle of the shape so that the outer edge aligns with the centre line.
Repeat on the other side, folding the left corner up and in to the centre line. The edges of both folds should meet along the centre line.
Flip your crane over and repeat on the other side.
-
9. The chopstick fold
How to make paper cranes: the chopstick fold Now lift up the entire top right side of your shape and fold it over the other side, just like you are turning the page of a book. Press down.
Flip the paper over and repeat this fold in the same direction on the other side.
-
10. The crown fold
How to make paper cranes: the chopstick fold. Lift up and fold the top chopstick (that’s one of the longer triangles which should be pointing towards you) so its point meets the other points at the top. Press the fold down.
Then, flip the paper over and repeat on the other side.
Then, just as you did before, fold the entire right side top layer over to the left like the page of a book.
Flip the paper over and repeat the fold in the same direction on the other side.
-
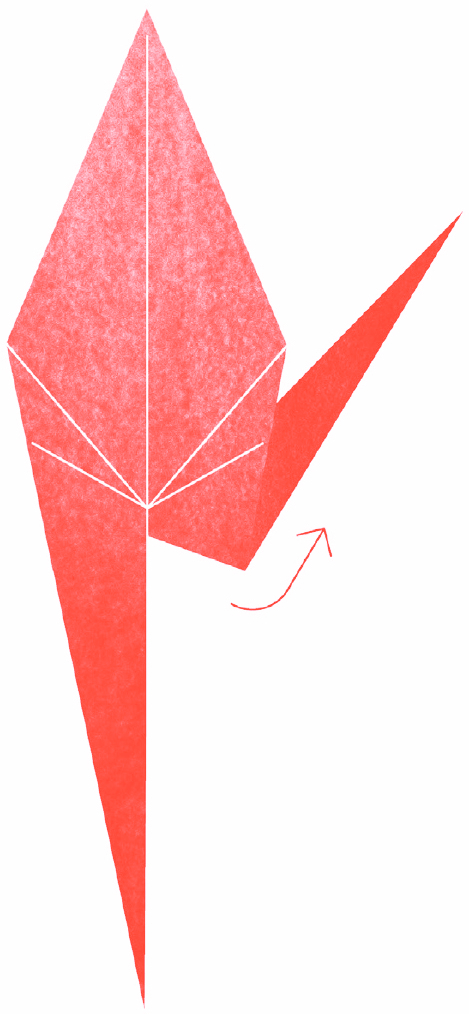
11. The wisdom fold
How to make paper cranes: the wisdom fold. Then pull out the long pieces of paper, these are the neck and the tail.
Run your thumb up the crease of the neck. Measure with your thumb roughly one centimetre from the top of the neck.
Pinch gently and fold downwards. This should create the shape of the crane’s head and crown.
As you create this crowned fold you will need to invert the crease to create a pronounced shape for the head.
-
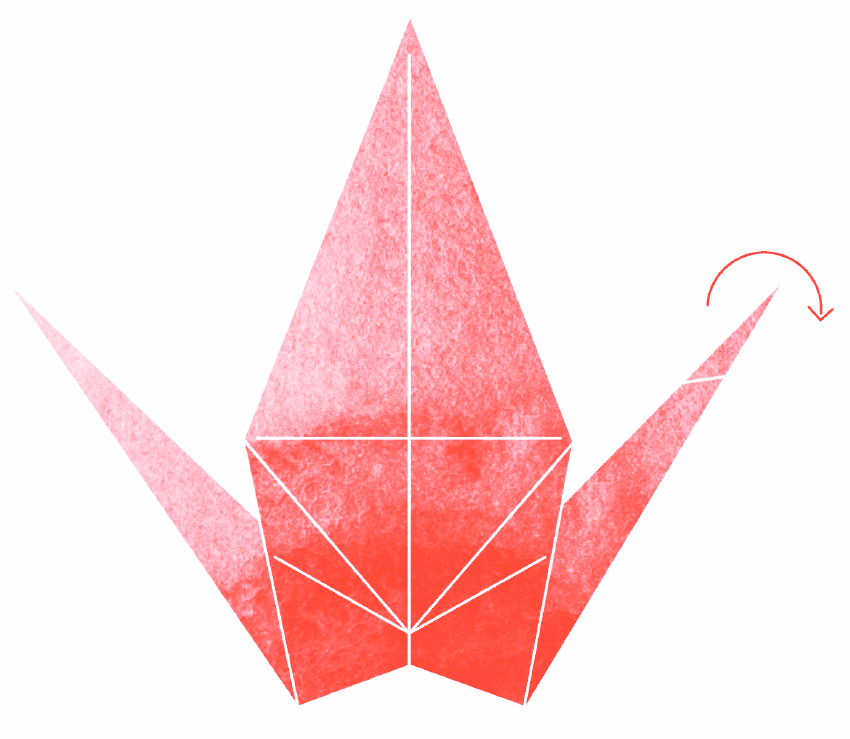
12. The final fold
How to make paper cranes: the final fold. Then fold down the wings, holding the base of the crane in one hand as you make the fold.
Use your thumbs to crease it firmly. If it is helpful, place your crane down on the table to use the hard surface behind to ensure the fold is deep.
Finally, very gently spread the wings of your crane apart.
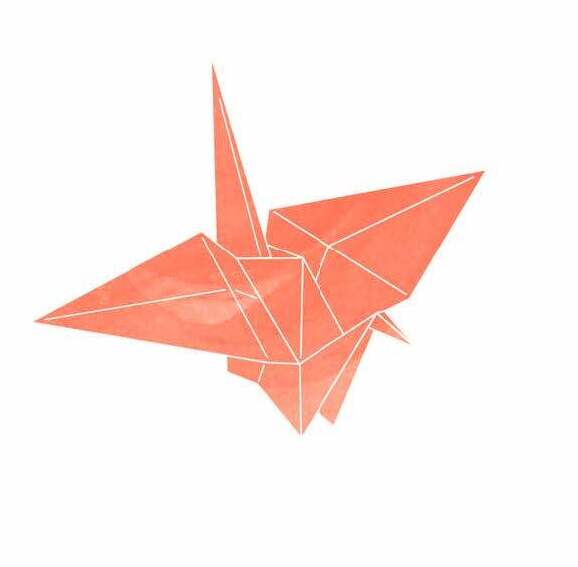
What to do with your finished crane
Once you’ve made your paper cranes, there are lots of things you can do with them. “They represent special moments. Sometimes you keep them for yourself, sometimes you make them with the intention to give them away or to leave them in sacred or special places,” Michael says.
He likes to carry one in his suitcase when travelling and he also likes to write intentions on the inside of his paper before beginning folding, almost like creating a wish.
Another tradition is to begin folding paper cranes one year before a special event, like a wedding or a big birthday, with the intention of creating 1000 for luck.
You can read more arts and crafts content at Stylist.co.uk. You can also buy Michael’s book and follow him on Instagram.
-
Michael James Wong, author, speaker and meditation teacher

How to make origami with Michael James Wong Michael is the founder of mindfulness app Just Breathe. He is an author, speaker, community leader and meditation teacher who is dedicated to expanding the conversation around the mind and mental health.
Images: Michael James Wong and Penguin
Source: Read Full Article